
This was a dream bike build for me and lots of readers share the dream, so here goes:
Build or buy?
Building means you specify all the components. Even $5K bikes often come with pretty lame wheels, crank sets, cassette etc and you will not get to choose tires, seat, shifters, calipers, bars etc. It was a no-brainier to build, and I am happier with this ~$2,500 build up than most (all!) $4K stock bikes. Why the cost difference? I could hunt down discounted parts. E.g. the shocks, wheels, and frame are not 2009 models.
If you are returning to mountain biking look in the ~$700 range for an off-the-shelf bike with front shocks and disc brakes, any less and you’ll not enjoy the sport. Getting semi-serious means $2K+ on a full suspension bike. Regulars I see again and again at local mountain bikes trails are mostly riding $2,000-$3,500 machines with maybe 10-20% spending even more. The sticker shock takes a few weeks to get over. If you do buy off-the-shelf look at the specs to see if any parts are ‘custom’. Custom generally means it is a non standard size, and replacement/ re-use on another bike will be hard or impossible. Another good reason to build. At the end of the day this sport is more about the rider, but go too cheap and parts will soon break costing you more in the long run.
Tools needed?
Quite lot of tools are needed, probably at least $400 worth. In rough priority order:
. Allen key set (~$10)
. Allen key sockets (~$15)
. Torque wrench (~$50)
. Cable/ Housing cutters (~$20)
. Bottom bracket tools (~$30)
. Cassette whip/ remover (~$20)
. Decent work stand (~$200)
. Headset press ($50->120)
. Crown race setter (I use a $3 tube from a DIY store)
. Star nut setter (~$10)
. Pipe cutter (~$20)
. Chain link splitter (~$10)
. White lithium grease (~$3)
. Several misc DIY tools you should already have
Where to start
Stripping and rebuilding your old bike is a great learning experience; it should you take a day or two. You’ll be annoyed how expensive new cables/ housings are, but will have a slicker bike at the end of it. I bought an $89 Sette 16″ frame and rebuilt an old bike into one the correct size for my wife, it came in at ~22.5lbs which is amazing for an $89 frame and $300 shocks.
Hunting down the Dream Bike
Boy, this took me many hours online – scouring reviews, price trade-offs, forum postings etc. The most useful resource is the mtbr reviews forum – for each part I looked at the bad reviews, and also got a good idea of what everyone was buying for that component. This way I found some parts that I am really happy with, e.g. Odi Ruffian removable grips and the Thompson Elite seat post.
Search lots of bike sites as prices often differ widely, for each high value part use comparison shopping sites like Froogle – this found me XT cranks at over $100 off when everywhere else wanted MSRP.
Below I will try to discuss the trickier choices made; in general I tried to distinguish between parts I may upgrade and parts I should never need to replace on this bike. E.g. ‘cheap’ mechanical BB7 disc brakes vs. the Thompson seat post. In some areas you probably want to check out lower-end parts before splashing out, I put a Manitou R7 fork on my wife’s bike and rode it for a while before justifying $800 Fox forks.
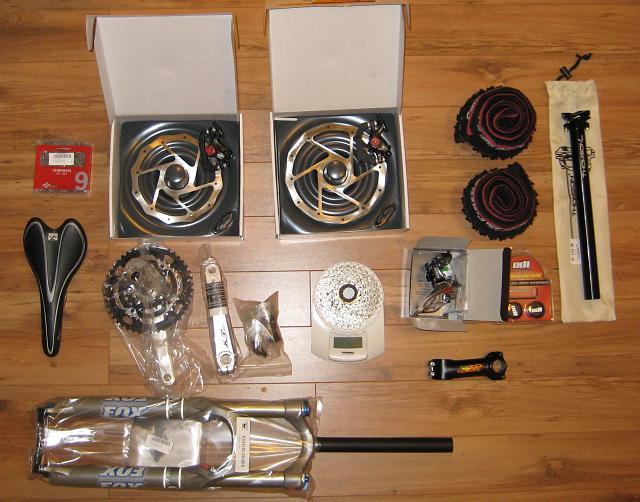
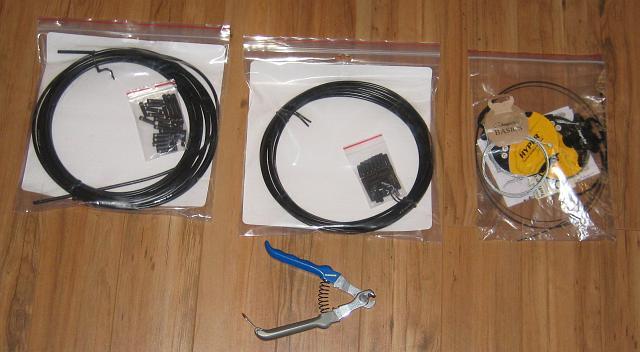
Parts Arrive
This bike comprised of eight or nine boxes of parts from five different suppliers. As I said there can be HUGE price differences between retailers, so the extra shipping costs are more than worth it.

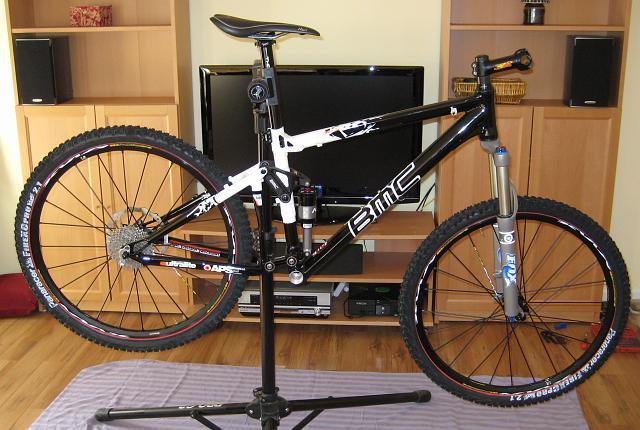
BMC Trailfox 2.0 Frame under wraps
This is a unsold 2007 found for $499, MSRP for a 2009 model is $2,149.
If this does not excite you then you are dead.
Avid BB7: My first disc brakes and they rock. No longer am I locking up/ skidding after being airborne + doing endos etc is very controllable. Be sure to use Avid speed dial levers so you can adjust the lever pressure required.
Fox Talas 140 RLC: When downhilling it is immediately obvious that these work better than my Manitou R7 MRD and I loved the Manitou. The 100-120-140 adjustability is great, I run 120mm for XC and 140mm for DH/ light FR. 100mm feels plain weird on the BMC frame so stays unused. With hindsight the 150mm Talas model would have been a better choice, but these things were expensive as-is. If buying a Fox fork be aware that adjustable compression is only on the RLC models and adds a lot more to the base price. Add the QR15 option and you are close to $1000 for shocks alone!
Thomson Elite Seat post: Brilliant! It has machined groves which stop the post slipping and must be about as light as the carbon EC70 post that slipped so often on my old bike.
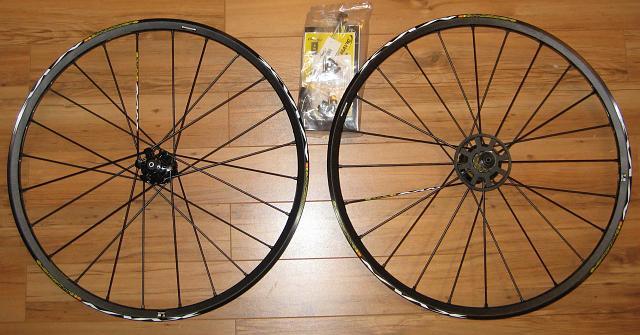
Mavic Crossmax ST:Good wheels are must, try finding these stock on anything less than $5K. These can run tubeless tires but as with hydraulic brakes they seemed an unnecessary complexity I did not want to deal with. Perhaps a future upgrade?
The Build Begins
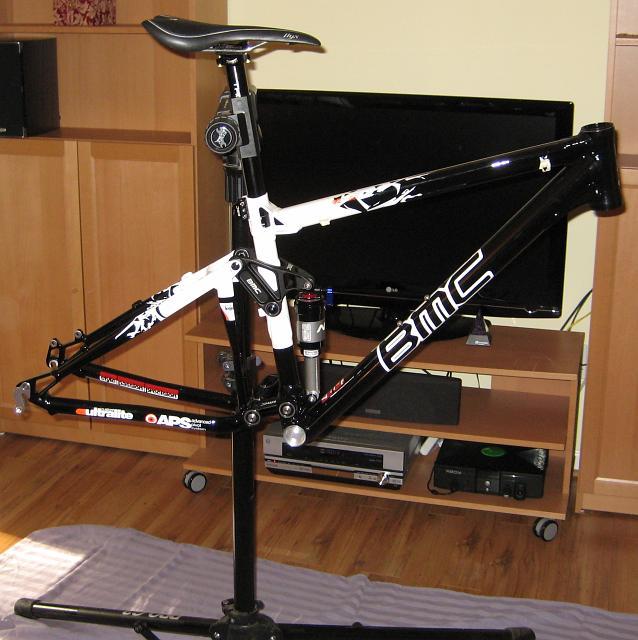
Rule one: never clamp anything but the seat post, tubing on modern higher-end frames can be crushed otherwise. Install the seat post and mount in your stand.
Rule two: Weigh everything before it goes on the bike. You will want this info when shopping for upgrades.
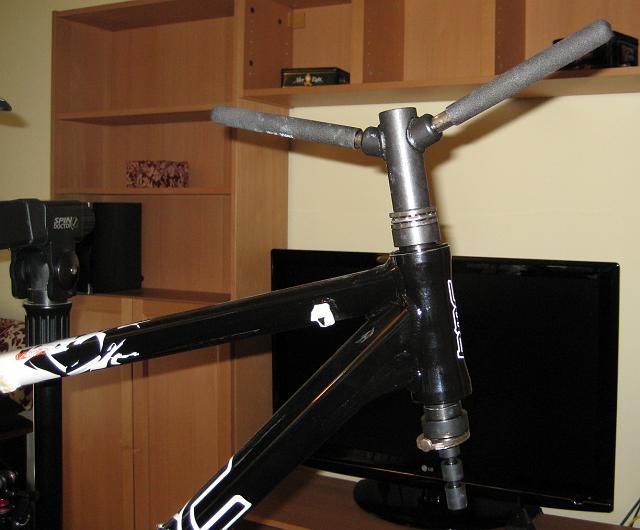
Pressing in a headset: This BMC came with one pre-pressed but this is the tool you should use – a headset press. Almost all headsets these days are threadless and press in, instead of screwing in like they used to. This is a much better system as a headsets coming loose was common in the 80s and 90s.
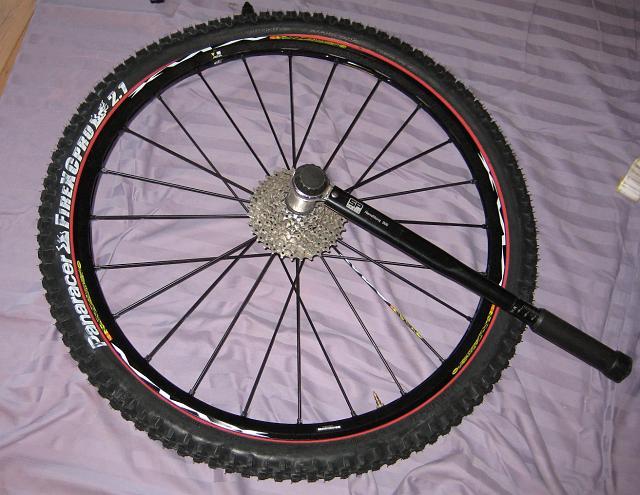
Attach the cassette– needs a lot of torque and the special tool is called a cassette remover. This is a 9 speed cassette I had laying around; it will be a PG990 soon.
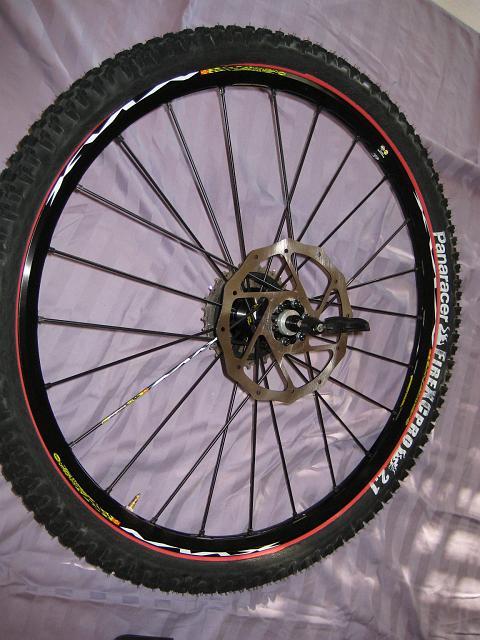
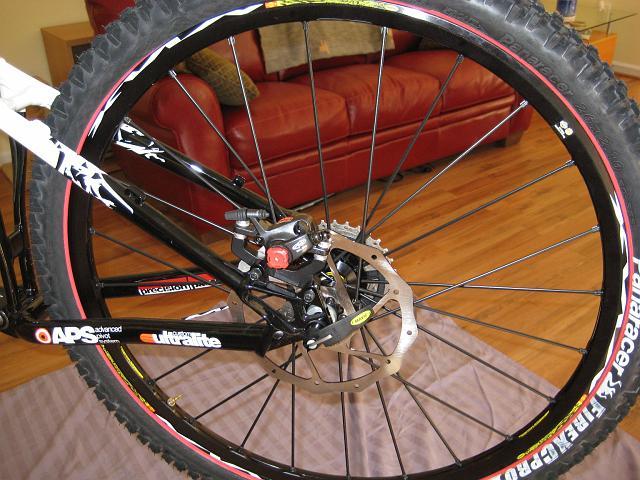
Attaching brake discs to wheels– use a torque wrench if possible. These are my first disc brakes so BB7 mechanicals were ideal; $46 each for 2009 models is a bargain. Rotor size was copied from a Sepcialized Enduro at 203mmF, 185mmR. With hindsight this is total overkill and they will soon be swapped for 160mm front and rear. Unless you weigh 250lbs and shuttle ski runs I cannot see 160mms overheating.

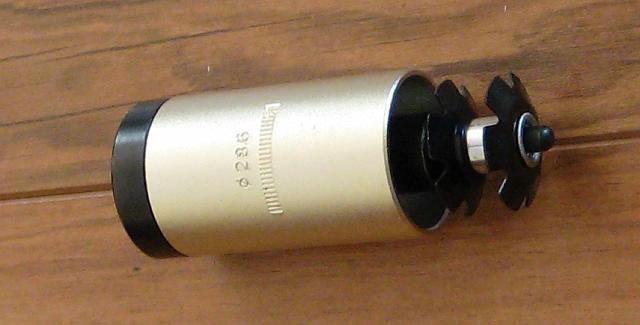
Pressing the crown race into place. That is a $3 piece of plastic piping which almost everyone uses – no other special tools are required.
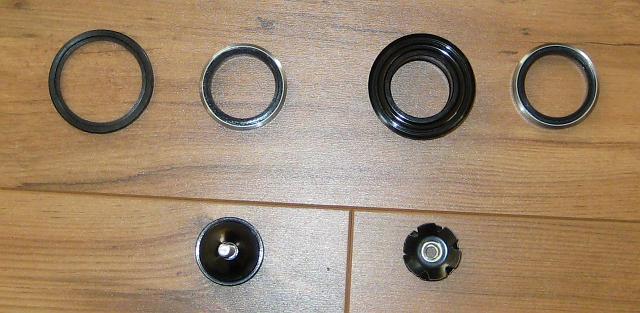
The other headset parts. This can be confusing for a beginner so make you download the relevant pdf. These are sealed bearings; don’t bother saving a few pennies on the old bearings-in-a-cage variety. Note: I missed the compression ring form this photo.
Mounting the wheels getting ready to size the steerer; use something to prop it up. Put the headset parts, stem and spacers (max 30mm) in place. Measure twice, cut once. Do not cut a steerer too short as the repair will be expensive.
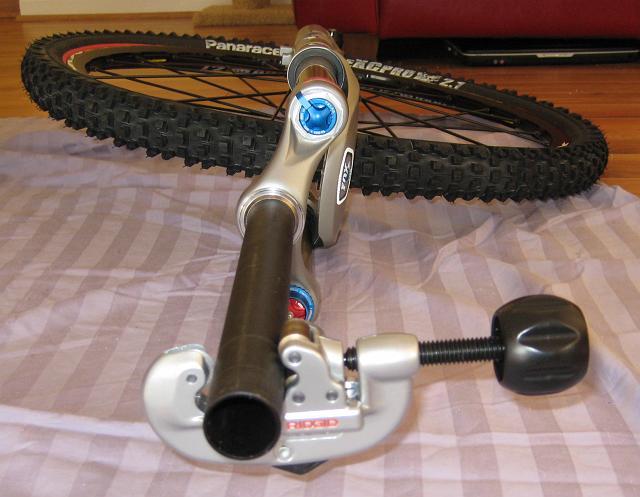
Cutting the steerer– the pipe cutter is just a plumber’s tool. Debur using the tool’s deburrer and then smooth off with a metal file.
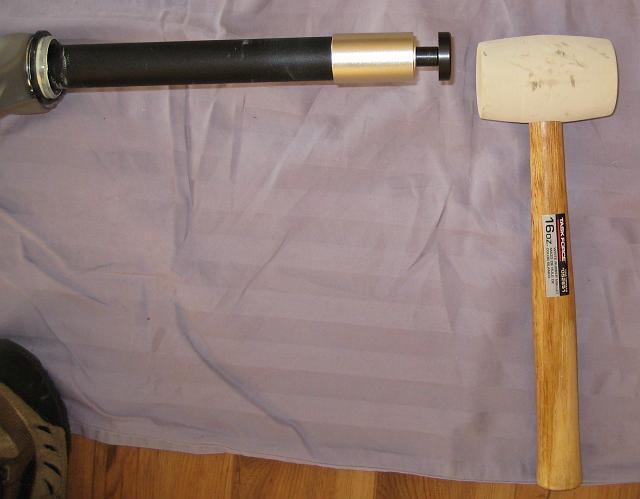
A star nut setter: Star fangled nuts are easy to bash it in with a hammer and I have done that before, but not on an $800 fork. The setter tool is only ~$10 so why not use one?
Depth of start nut varies on who you ask, from 4mm to 20mm. I set this one to 10mm. It should not matter since the star nut is only used to preload the headset bearings, the stem bolt holds things together.
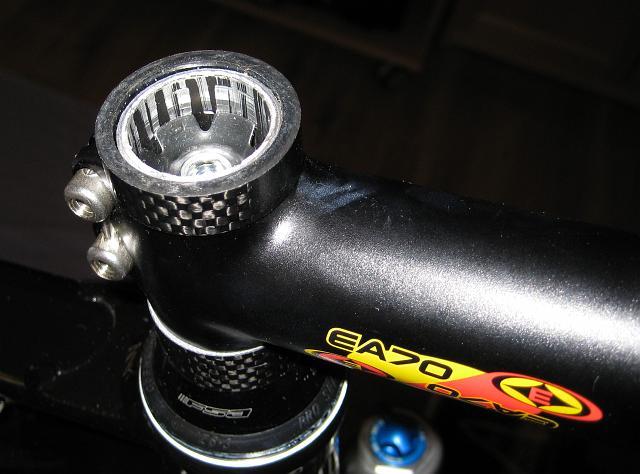
Leave a gap from the top of the spacer to the stem since you are going to preload the bearings in a minute. The star nut bolt does not need to be very tight, just enough to stop play in the headset. I put the bike on the floor and tighten the steerer nut until steering becomes tight, then back off a little. At this point you should tighten the stem bolts.
Disc brakes and Hollowtech cranks are next. Both being new to me it is time for lunch. There is no point rushing and I want a clear head especially for that expensive crankset.
Putting a caliper in place– very simple but you will need a mounting bracket that matches your frame and the rotor size. There are three different standards out there so do some homework on this or expect a trip to the local bike shop to find the correct mounting hardware. Avid brakes come with a cool auto-alignment system (CPS) that works much like the curved washers from v-brakes. This mitigates having to face brake mounts.

Hollowtech cranks: The scariest component. MSRP is $305 but all affordable cranksets seemed to have bad reviews. Hollowtech means outboard sealed bearings and very few parts + look bulletproof. The black spacers are for use with a 68mm shell like I had – another plus, this a one-size-fits-all deal.
Of course they needed a new tool. A torque wrench cannot be used with this tool so I used the torque wrench on my car’s wheel nuts to verify what 50Nm feels like. You do not want to strip BB threads!
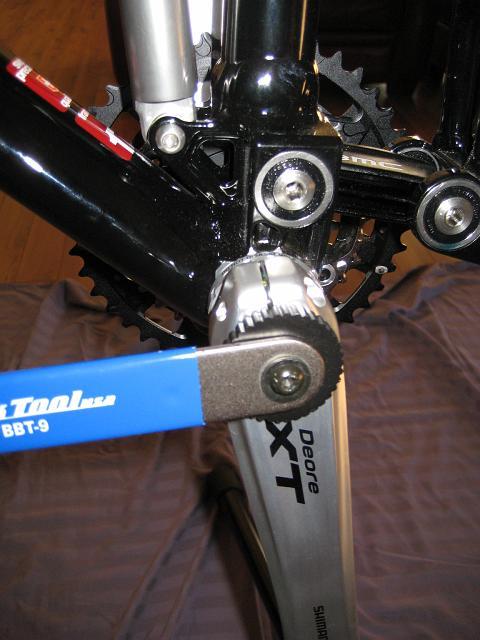
This side requires very little torque and simply preloads the bearings. Tightening the crank on is done with two allen bolts at 90 degrees to the crank – they come with a stack of warnings so I doubt you’ll get it wrong.
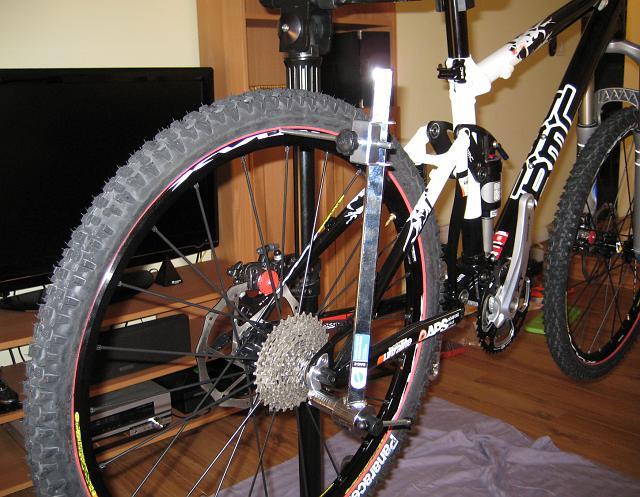
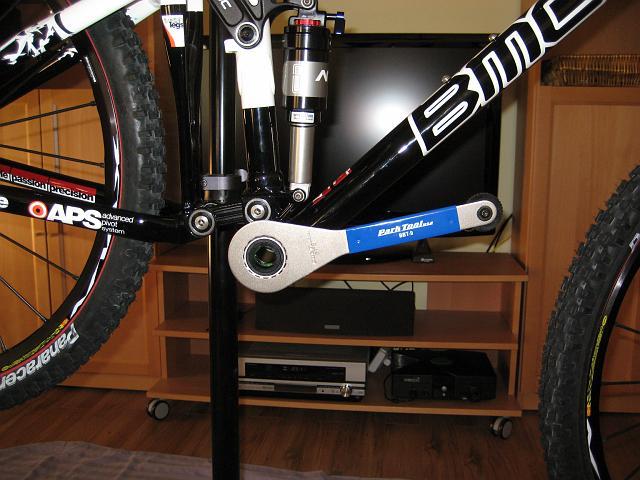
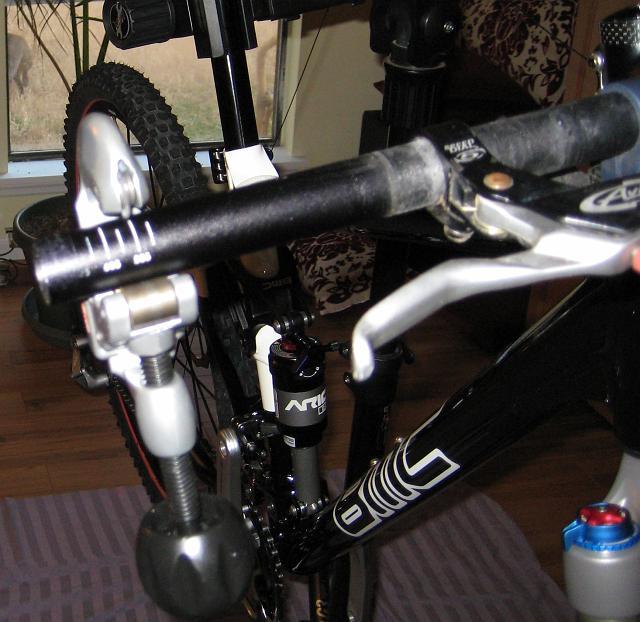
Derailleur Alignment Tool: I am not sure how accurate the tool is, but all three bikes I used it on had misaligned hangers. Misaligned in different ways so I assume the tool is correct. Use the tool to check Up, Down, Left and Right – lightly bending the hanger until it is within 4mm on any measurement. I have to say that my shifts are pretty smooth and maybe this helped?
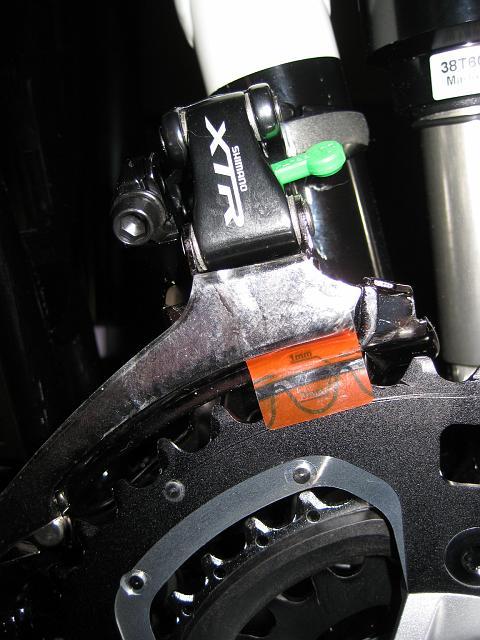
The spoils of XTR components. The front mech comes with a helpful guide to set the correct distance from the chainrings. If you are buying XTR you can probably eyeball this measurement.
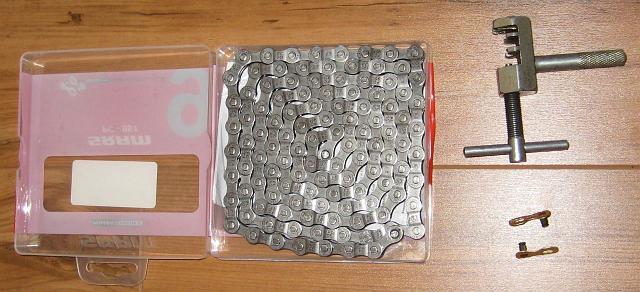
New SRAM chain. Note the removable link which means the chain can easily be removed in the future. The other tool is a chain link splitter which is only needed to remove links from the chain if it is too large.

Put the chain around both large cogs and allow for two extra links. I have ran with zero links before and had no issues – actually I might do the same on this bike to reduce chainslap on rutted downhills. With a tight chain running the extremes of gear combinations is the only issue, but that is a no-no anyway.
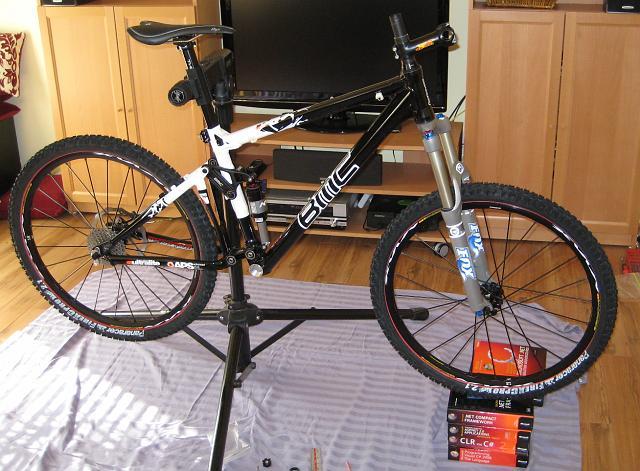
It is looking like a real bike now.
Cables: … ugh, not hard but it takes a while. You must use a specific cable cutter or expect frayed cables. Housing and cables are different for both brakes and gears, also these days we run continuous housing from the levers to brakes – use tiny zip ties or special clips to attach the brake housing to the frame. Zip ties are my preference.
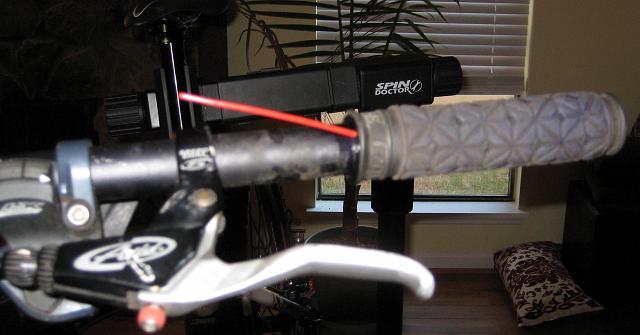
Initially I am using an old set of bars/ levers but wanted to dump the old grips. Push a WD40 tube as far as you can, spray in oil and twist. These came off totally intact with little bother.
I had never used these bars and they were incredibly wide. It was cool to see preset cut-down points. Again a few twists of a plumbers pipe cutter and deburring is all that is required.
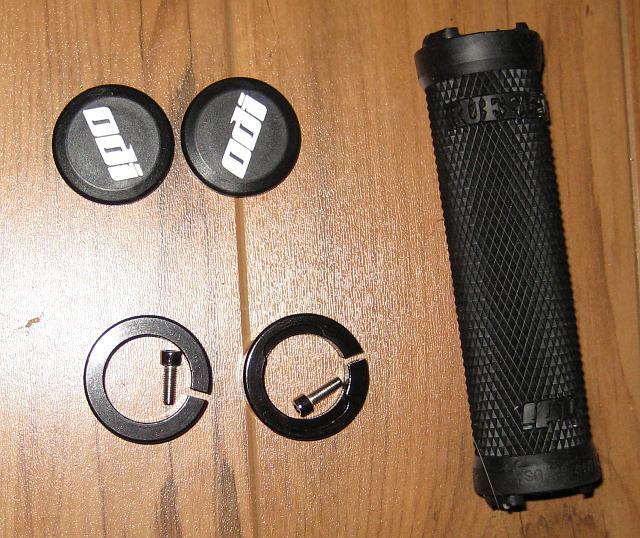
Removable grips: What an awesome idea for people that love swapping out components. My hands grip really, really well with these – possibly the best part on the whole bike!
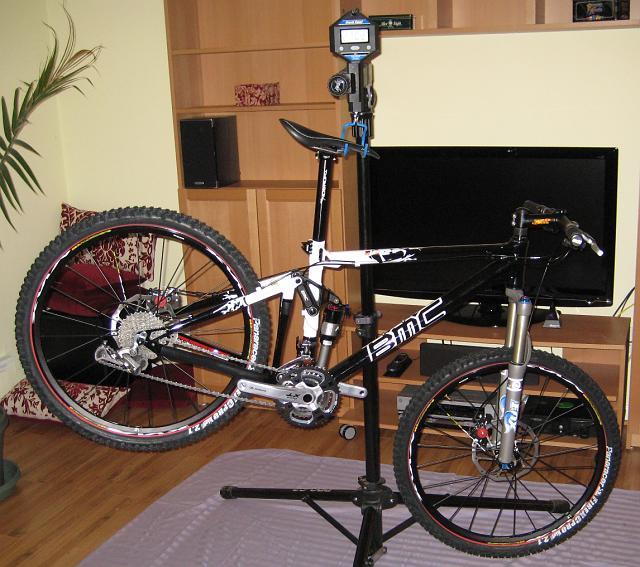
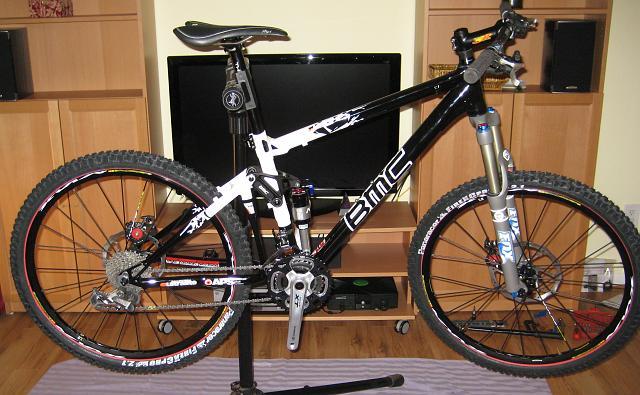
Six hours later it is complete (cables were tuned the next morning). It came in at 27lbs 8oz which for a ~$2,500 5″ travel all mountain bike is not bad at all. It should drop about a pound when replacing the old bars, shifters and oversized brake discs. Those tires are 2.6lbs too, yeah, yeah weight weenie.
The Results?
Time and money very well spent. The brakes in particular are changing my riding style, locking up is now almost a thing of the past, especially when scrubbing off speed after time in the air – especially when a corner is almost immediately after landing. Having full suspension makes rides so much less fatiguing and landing misjudged takeoffs much safer.
For a brand that is almost unknown in the US it attracts a lot of attention and questions – everyone so far seems to approve.